Craftsman 917.254421 Owner's Manual Page 8
- Page / 26
- Table of contents
- TROUBLESHOOTING
- BOOKMARKS
- - 44"" 1
- 3AFE' "Y RUL5S 2
- TOR FEATURES 3
- ........................ 18 4
- SEAT PAN 7
- CLUTCH BRAKE PEDAL 7
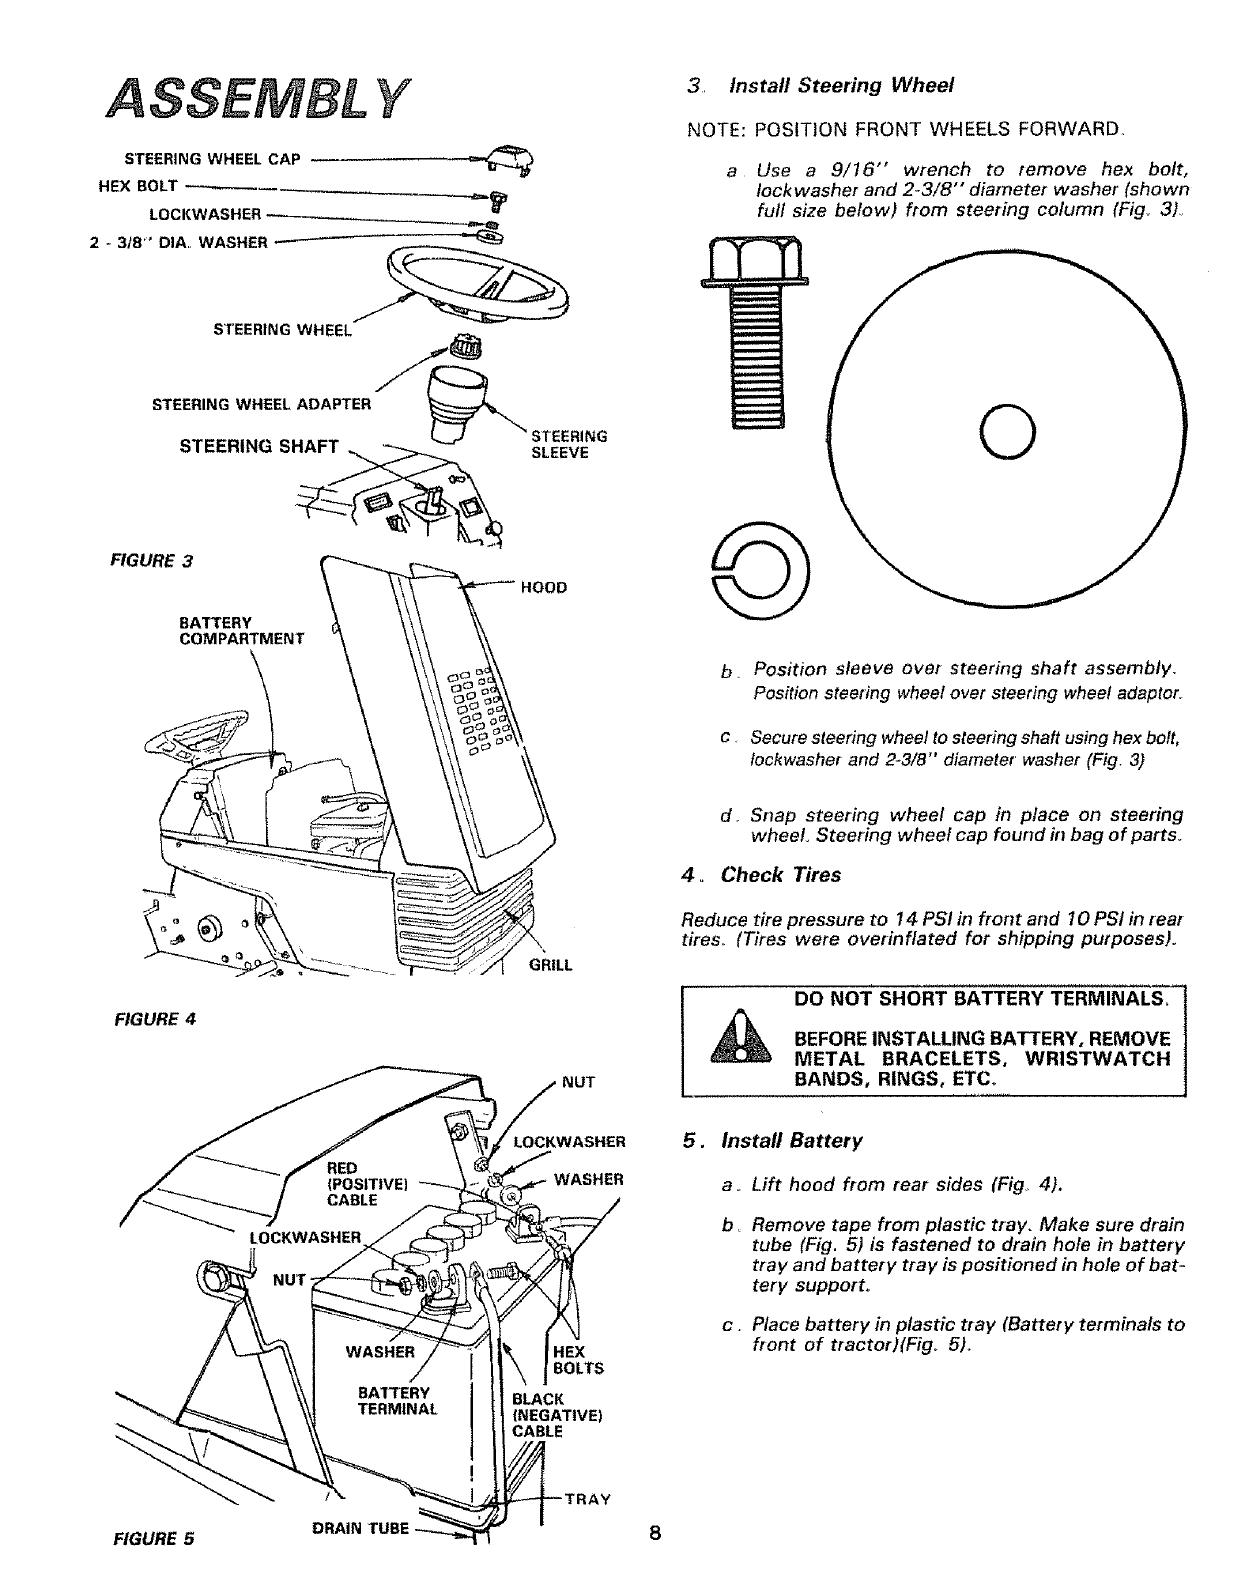
- ASSEMBL Y 10
- OPERA TION 11
- OPERA ON 13
- INTENANCE 15
- ' 1 16
- MAINTENANCE 17
- THROTTLE 20
- ADJUSTMENT 21
- AND ADJUSTMENT 22
- REPAIR AND ADJUSTMENT 24
- TROUBLESHOOTING 25
Related products and manuals for Lawnmowers Craftsman 917.254421

 (105 pages)
© 2020, manymanuals.com. All rights reserved. | 0.033 s |
 Manymanuals.com
 Manymanuals.de
 Manymanuals.fr
 Manymanuals.it
 Manymanuals.pl
 Manymanuals.cz
 Manymanuals.es
 Manymanuals-pt.com
Comments to this Manuals