Craftsman 137.218300 Operator's Manual
Browse online or download Operator's Manual for Power tools Craftsman 137.218300. Craftsman 137.218300 Operator`s manual User Manual
- Page / 32
- Table of contents
- BOOKMARKS
- Operator's Manual 1
- IAWARNINGI 2
- POWER SUPPLY REQUIREMENTS 5
- EXTENSION CORD REQUIREMENTS 5
- GROUNDING INSTRUCTIONS 5
- RECOMMENDED ACCESSORIES 6
- Blade elevation 8
- Leadin Edge 9
- Sawblade Path 9
- Trailing Edge 9
- 90 o 45 ° 13
- Fig. M-1 1 14
- Fig. N 1 15
- Fig. Q -1 16
- Fig. Q-2 16
- BASIC SAW OPERATIONS 17
- Fig. X-1 19
- 30" 20
- 27" 20
- MAINTAINING YOUR TABLE SAW 21
- GENERAL MAINTENANCE 21
- MODEL NO. 137.218300 24
- Schematic B 26
- 10" JOB SITE TABLE SAW 28
- Part list for STAND 28
- / 01 " 29
- Part list for MOTOR 30
- Your Home 32
- Our Home 32
- 1-800-488-1222 32
Summary of Contents
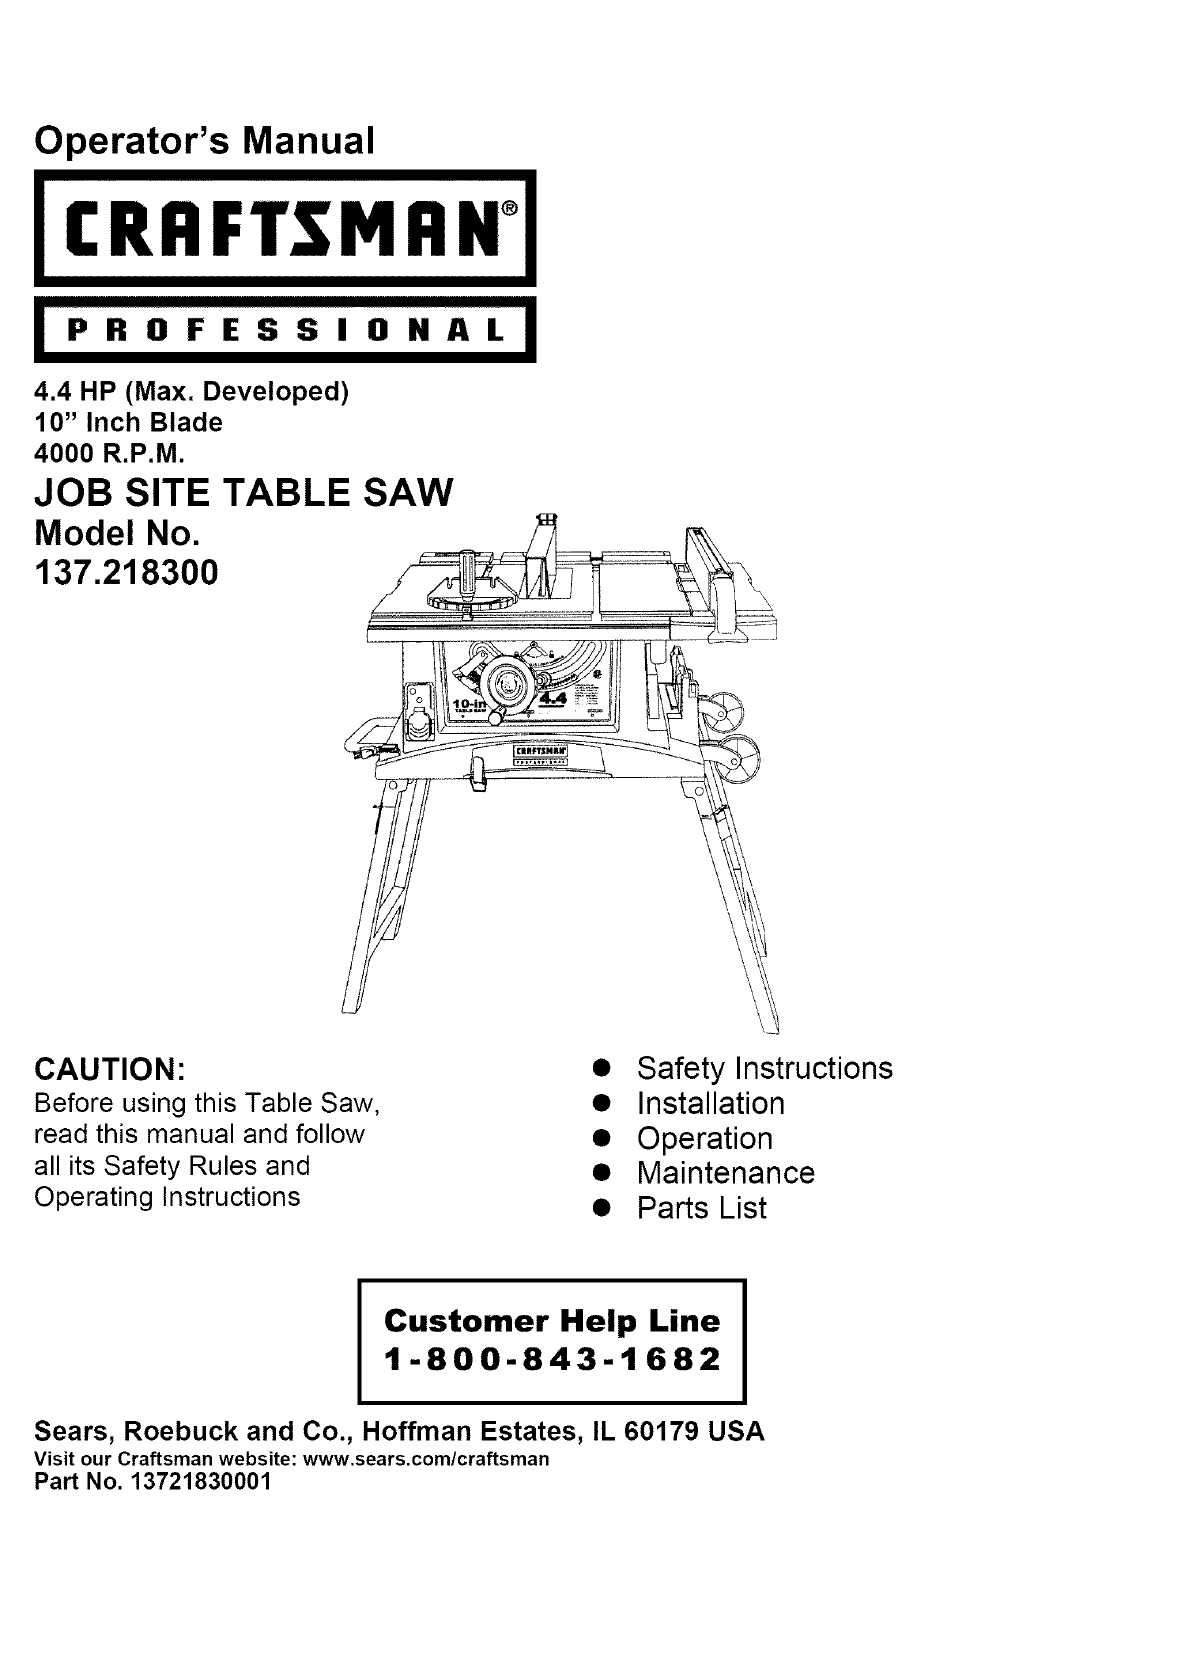
Operator's ManualI ,,o,:,:ss ""'i4,4 liP (Max. Developed)10" Inch Blade4000 R.P.M.JOB SITE TABLE SAWModel No.137.218300CAUTIO
ASSEMBLE THE TABLE SAW TO THE STAND(FIG. B)1. Release the stand buckle (t) as shown.2. Unfold the leg sets and push the two latches (2)downward to loc
pBLADEGUARD ASSEMBLY (FIG, E, F)To avoid injury from an accidental start, make sure theswitch is in the OFF position and the plug isdisconnected from
REMOVING THE BLADE (FIG. G) INSTALLING A BLADE (Fig. G)To avoid injury from an accidental start, make surethe switch is in the OFF position and the pl
Fig. H90 o 45 °45° Stop1. Disconnect the saw from the power source.2. Raise the blade to the maximum elevation.3. Loosen the blade bevel lock handle a
Additional blade adjustments (Fig. K)1. If the front and rear measurements are not thesame, remove the combination square and loosenthe four adjusting
RIP FENCE ADJUSTMENT (FIG. N)1. For adjustments, position the fence to the right ofthe blade, parallel with the miter gauge groove.2. Place the rear c
AUTOMATIC POWER CORD RECOIL SYSTEM(FIG. Q)1. To extend the power cord, release by lifting up onthe locking lever, then pull the power cord to thedesir
BASIC SAW OPERATIONSRAISE THE BLADE (FIG. R)To raise or lower the blade, turn the blade elevationhandwheel (1) to the desired blade height, and thenti
CUTTING OPERATIONSThere are two basic types of cuts: ripping andcrosscutting. Ripping is cutting along the length and thegrain of the workpiece. Cross
BEVEL RIPPINGThis cut is the same as ripping except the blade bevelangle is set to an angle other than "0°''.RIPPING SMALL PIECESTo avo
SECTION PAGEWarranty ... 2Product Specifications ... 2Power Tool Safety ...
MITERING (FIG, AA)This sawing operation is the same as crosscuttingexcept the miter gauge is locked at an angle otherthan 90°1. Hold the workpiece (2)
MAINTAINING YOUR TABLE SAWGENERAL MAINTENANCEFig. DDFor your own safety, turn the switch OFF and remove theswitch key. Remove the plug from the power
To avoid injury from an accidental start, turn the switch OFF and always remove the plug from the power source beforemaking any adjustments•• Consult
-- 4--_Cut_off here to-.- - pushl/2"wood.-!Notch to helpprevent handfrom slipping,PUSH STICKMake from 1/2" or 3/4"wood or thicknessless
10" JOB SITE TABLE SAW PARTS LISTWhen servicing use only CRAFTSMAN replacement parts.damage.MODEL NO. 137.218300Use of any other parts may create
IiIIII29R5<1 IIiIiIOKO_OK6iIIL29R8°\20_IIiIi,f'#30_'t_mmWrmOmrzO
10" JOB SITE TABLE SAW PARTS LIST MODEL NO. 137.218300Schematic BI.O, Description Size Qty2149 KNOB #23 108Wl BRACKET 108W2 SPACER 108WG ANGLE RO
O_' t_mO3 --ImWr-mor)OJ4FIOKWOKASsiIIOJA_ ",IOJ4F,/IIIIIIi29R4OI"I1r-ZOt_-,4.dLoot_
10" JOB SITE TABLE SAWPart list for STANDMODEL NO. 137.218300I.D, No. Description Size Qty0lAD WtNG NUT 101AE LEVELING PAD 10J4g FLAT WASHER _;_1
10" JOB SITE TABLE SAW MODEL NO. 137.218300STAND222K_</ 01 "
Before using your table saw, it is critical that you read and understand these safety rules.Failure to follow these rules could result in serious inju
10" JOB SITE TABLE SAW MODEL NO. 137.218300Part list for MOTORI.D. Description Size Qty0J92 SPRING WASHER g_5 3OJB8 WAVE WASHER ]OgX3 HEX. SOC. S
//10ZKO o--4 ¢..0 0WO_.-ImWr-m0_00mr-Z0i,ooo
Your HomeFor repair-in your home-of all major brand appliances,lawn and garden equipment, or heating and cooling systems,no matter who made it, no mat
,ALWAYS USE SAW BLADE GUARD, splitter and 12.anti-kickback pawls for every operation for which theycan be used, including through sawing. Throughsawin
POWER SUPPLY REQUIREMENTSTo avoid electrical hazards, fire hazards or damage tothe table saw, use proper circuit protection. Alwaysuse a separate elec
RECOMMENDED ACCESSORIESUNPACKING AND CHECKING CONTENTSVisit your Sears Hardware Department or see theCraftsman Power and Hand Tools Catalog to purchas
UNPACKING YOUR JOB SITE TABLE SAWEC A%kGN0'----" __..J _._,_ _-__"-_Q
Blade GuardMiter GaugeHand holdHand holdRip FenceBlade elevationhandwheelBlade tilt pointerBlade tilt scaleOverload resetswitchStand handleON/OFF swit
CRAFTSMAN PROFESSIONALTABLE SAW TERMSMITER GAUGE - A guide used for crosscuttingoperations that slides in the tabletop channels locatedon either side
Related products and manuals for Power tools Craftsman 137.218300
 (32 pages)
 (48 pages)
© 2020, manymanuals.com. All rights reserved. | 1.570 s |
 Manymanuals.com
 Manymanuals.de
 Manymanuals.fr
 Manymanuals.it
 Manymanuals.pl
 Manymanuals.cz
 Manymanuals.es
 Manymanuals-pt.com
Comments to this Manuals