Craftsman 152.217050 Operations Instructions Page 11
- Page / 60
- Table of contents
- BOOKMARKS
- truction anu 1
- SAVE THESE INSTRUCTIONS 3
- GUIDEUNES FOR 4
- EXTENSUON CORDS 4
- 120 Volt 3-prong 5
- 120 Voff 5
- 240 Volt 6
- SPECIFIC SAFETY iNSTRUCTiONS 6
- FOR JOINTER/PLANER 6
- AVAILABLE ACCESSORIES 7
- 29----m@ @ 9
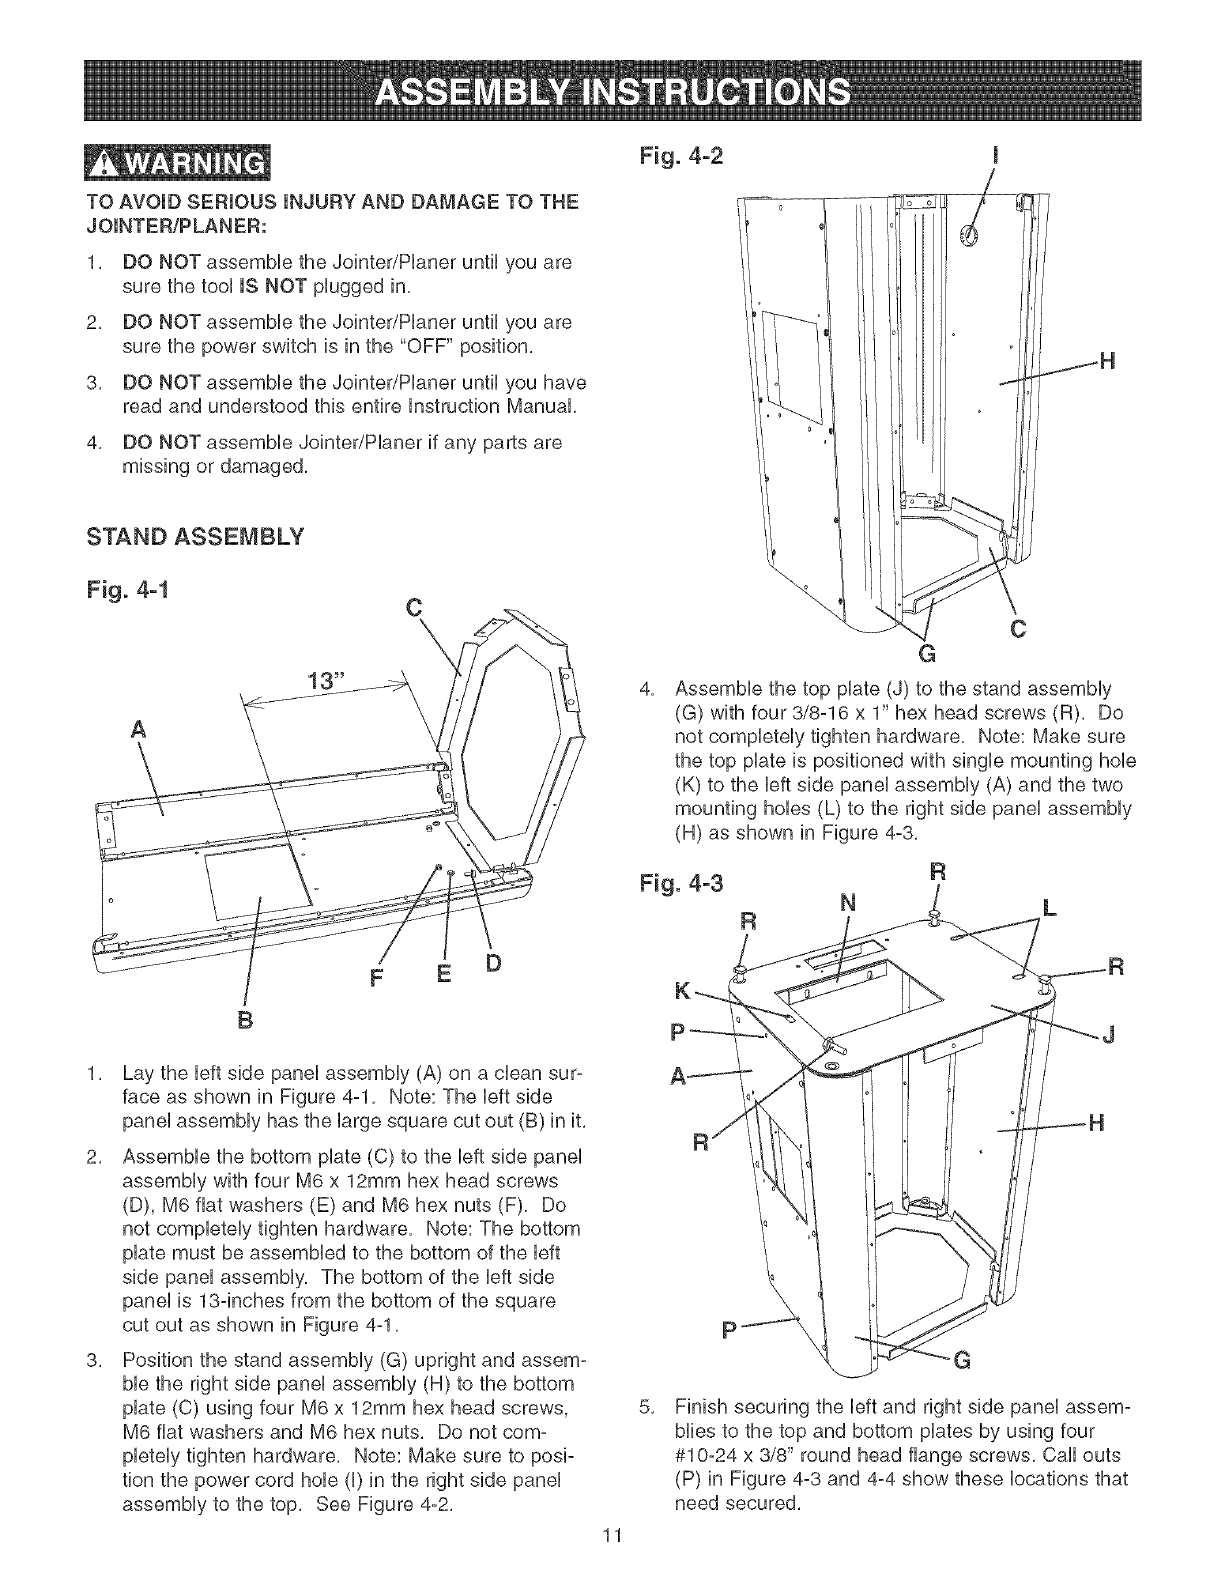
- Fig. 4-2 I 11
- Fig. 8-1 14
- Fig. 9-1 14
- ADJUSTING TABLE GUBS 24
- Fig. 21-1 24
- CHANGUNG MOTOR VOLTAGE 24
- Fig. 22-1 25
- FROM RUST 26
- LUBRiCATiON 26
- PROTECTING CAST iRON TABLE 26
- 1°800°897°7709 33
- GUARDE ESTAS INSTRUCCIONES 35
- DIRECTRICES PARA 36
- LAS EXTENSUONES ELECTRICAS 36
- 120 Vo_tios 37
- 240 Vo_tios 38
- INSTRUCCIONES DE SEGURIDAD 38
- ESPECiFICAS PARA LAS 38
- MACHUMBRAZ)ORASiCEPILLAZ)ORAS 38
- ACCESORIOS DISPONIBLES 39
- 29.......@ © 41
- AJUSTANDO LAS CORREDERAS 56
- DE AJUSTE 56
- PROTEGIENDO LA MESA DE HIERRO 58
- MOLDEADO CONTRA LA OXIDACION 58
- LUBRICACI6N 58
- Your Home 60
Related products and manuals for Power planers Craftsman 152.217050
 (32 pages)
 (56 pages)
© 2020, manymanuals.com. All rights reserved. | 3.273 s |
 Manymanuals.com
 Manymanuals.de
 Manymanuals.fr
 Manymanuals.it
 Manymanuals.pl
 Manymanuals.cz
 Manymanuals.es
 Manymanuals-pt.com
Comments to this Manuals