Craftsman 139.53995SRT Owner's Manual Page 1
Browse online or download Owner's Manual for Garage Door Opener Craftsman 139.53995SRT. Craftsman 139.53995SRT Owner`s manual User Manual
- Page / 80
- Table of contents
- BOOKMARKS
- GARAGE DOOR OPENER 1
- TABLE OF CONTENTS 2
- INTRODUCTION 2
- Preparing your Garage Door 3
- Tools Needed 3
- Planning 4
- Planning (continued) 5
- Carton Inventory 6
- Hardware Inventory 7
- ASSEMBLY STEP 1 8
- ASSEMBLY STEP 3 9
- ASSEMBLY STEP 2 9
- ASSEMBLY STEP 4 10
- ASSEMBLY STEP 5 11
- INSTALLATION 11
- INSTALLATION STEP 1 12
- INSTALLATION STEP 2 14
- INSTALLATION STEP 3 15
- INSTALLATION STEP 4 16
- INSTALLATION STEP 5 17
- Install the Door Control 18
- INSTALLATION STEP 7 19
- INSTALLATION STEP 8 19
- INSTALLATION STEP 9 20
- INSTALLATION STEP 10 21
- 7/16" (11 mm) 23
- INSTALLATION STEP 11 24
- Connect Door Arm to Trolley 26
- ADJUSTMENT STEP 1 28
- ADJUSTMENT STEP 2 29
- ADJUSTMENT STEP 3 30
- ADJUSTMENT STEP 4 30
- IMPORTANT SAFETY INSTRUCTIONS 31
- SAVE THESE INSTRUCTIONS 31
- To Open the Door Manually 32
- Using the Wall-Mounted 32
- Door Control 32
- Care of Your Opener 33
- Having a Problem? 34
- PROGRAMMING 35
- To set a temporary PIN 36
- REPAIR PARTS 37
- KEY PART 38
- NO. NO. DESCRIPTION 38
- ACCESSORIES 39
- WARRANTY 39
- Your Home 40
- 1-800-4-MY-HOME 40
- Our Home 40
- 1-800-488-1222 40
- OUVRE-PORTE DE GARAGE 41
- TABLE DES MATIÈRES 42
- Outils nécessaires 43
- Planification 44
- ATTENTION 45
- AVERTISSEMENT 45
- AVERTISSEMENT AVERTISSEMENT 45
- Inventaire des fixations 47
- POSE - 2 54
- OPÉRATION 54
- POSE - 3 55
- BON MAUVAIS 60
- Figure 3 62
- Figure 1 62
- Figure 2 62
- POSE DES SUPPORTS 62
- Figure 4 63
- Situation 64
- PORTES RIDGES 65
- Min. de 8 po (20 cm) 66
- Figure 5 67
- RÉGLAGES - 1 68
- RÉGLAGES - 3 70
- RÉGLAGES - 4 70
- CONSERVER CES INSTRUCTIONS 71
- PROGRAMMATION 75
- PIÈCES DE REPARATION 77
- Pièces d’assemblage du moteur 78
- ACCESSOIRES 79
- GARANTIE 79
Summary of Contents
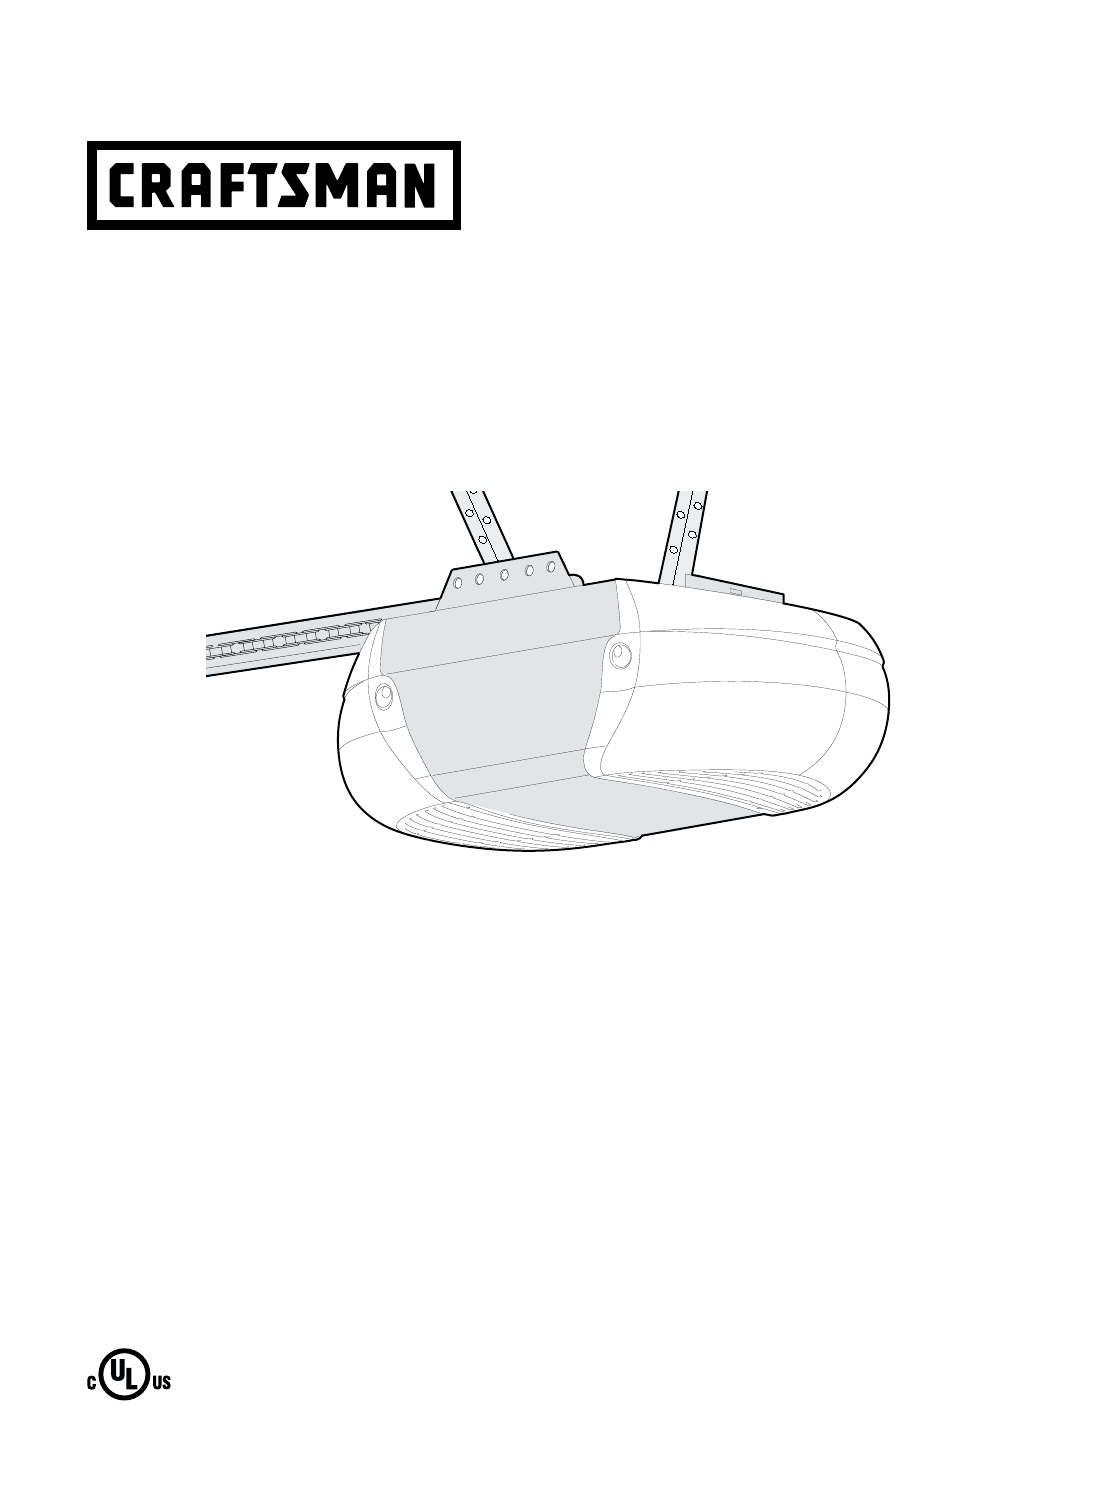
®1/2 HPGARAGE DOOR OPENERFor Residential Use OnlyModel • 139.18070®Read and follow all safety rulesand operating instructions beforefirst use of this
IdlerPulleyRound HoleMaster LinkClip-On SpringMasterLink CapTrolleyThreadedShaftMasterLink BarCable LoopCablePinNotchMaster LinkClip-On SpringMasterLi
ASSEMBLY STEP 5Tighten the Chain • Spin the inner nut and lock washer down the trolleythreaded shaft, away from the trolley.• To tighten the chain, tu
12One-piece doorwith horizontaltrack Header WallCeilingTrackHighest Pointof TravelDoor2" (5 cm)Sectional doorwith curved trackDoorTrackHeader Wal
13Header WallVerticalCenterlineVerticalCenterlineof GarageDoor2x4UnfinishedCeiling2x4OPTIONALCEILING MOUNTFOR HEADER BRACKETStructuralSupportsDoorHigh
Lag Screws5/16"x9x1-5/8"Vertical Centerline– Finished Ceiling –DoorSpringHeader WallUPCeiling Mounting Holes6" (15 cm) MaximumHeaderBra
Opener Carton orTemporarySupportGarageDoorOPTION WITHEXISTING CRAFTSMAN INSTALLATIONHeader BracketIdler PulleyHeader WallHeaderBracketMounting HoleExi
16ONE-PIECE DOOR WITHOUT TRACK• With the door fully open and parallel to the floor,measure the distance from the floor to the top ofthe door.• Using a
MeasureDistanceBolt 5/16"-18x7/8" Lock Washer 5/16" Nut 5/16"-18 Lag Screws5/16"-18x1-7/8"StructuralSupportsBracket(Not
18INSTALLATION STEP 6Install the Door ControlLocate door control within sight of door, at aminimum height of 5 feet (1.52 m) where smallchildren canno
19INSTALLATION STEP 7Install the Light • Press the release tabs on both sides of lens. Gentlyrotate lens back and downward until the lens hingeis in t
2Introduction pages 2-7Safety symbol and signal word review...2Preparing your garage door ...
20To prevent possible SERIOUS INJURY or DEATH fromelectrocution or fire:• Be sure power is not connected to the opener, anddisconnect power to circuit
21Invisible Light BeamProtection AreaSensor Beam6" (15 cm) max.above floorSensor Beam6" (15 cm) max.above floorFacing the door from inside t
22INSTALLING THE BRACKETSBe sure power to the opener is disconnected.Install and align the brackets so the sensors will faceeach other across the gara
23Carriage bolt1/4"-20x1/2"LensWing nutFigure 4Invisible Light BeamProtection AreaSensorSensorConnect Wire toQuick-Connect TerminalsBell Wir
24To prevent damage to garage door, reinforce inside ofdoor with angle iron both vertically and horizontally.INSTALLATION STEP 11Fasten the Door Brack
Horizontal and verticalreinforcement is needed forlightweight garage doors(fiberglass, aluminum, steel, door with glass panel, etc.)(not provided).Hea
26INSTALLATION STEP 12Connect Door Arm to TrolleyFollow instructions which apply to your door type asillustrated below and on the following page.SECTI
27ALL ONE-PIECE DOORS1. Assemble the door arm, Figure 4:• Fasten the straight and curved door arm sectionstogether to the longest possible length (wit
ADJUSTMENT STEP 1Adjust the UP and DOWN TravelLimitsLimit adjustment settings regulate the points at whichthe door will stop when moving up or down.To
ADJUSTMENT STEP 2Adjust the ForceForce adjustment controls are located on the backpanel of the motor unit. Force adjustment settingsregulate the amoun
3PliersWire CuttersClaw HammerHack SawScrewdriverAdjustable End WrenchLocking pliers1/2", 5/8", 7/16", 9/16" and 1/4" Sockets
Without a properly installed safety reversal system,persons (particularly small children) could beSERIOUSLY INJURED or KILLED by a closing garagedoor.
OPERATION 31IMPORTANT SAFETY INSTRUCTIONSTo reduce the risk of severe injury or death:Using Your Garage Door OpenerYour Security✚ opener and hand-held
32To Open the Door ManuallyDISCONNECT THE TROLLEY:The door should be fullyclosed if possible. Pulldown on the emergencyrelease handle (so that thetrol
33Care of Your OpenerLIMIT AND FORCE ADJUSTMENTS:Weather conditions maycause some minorchanges in dooroperation requiring somere-adjustments,particula
34Having a Problem?1. The opener doesn't operate from either the DoorControl or the remote control:• Does the opener have electric power? Plug a
Your garage door opener has already been programmed at the factory to operate with your hand-held remotecontrol. The door will open and close when you
To Add or Change a Keyless Entry PINNOTE: Your new Keyless Entry must be programmed to operate your garage door opener.USING THE “LEARN” BUTTON USING
16524378Rail Assembly Parts37KEY PARTNO. NO. DESCRIPTION1 4A1008 Master link kit2 41C5141-1 Complete trolley assembly3 183C158-3 Rail – front (header)
Motor Unit Assembly Parts38DNUPBrownWire(Down)ContactLIMIT SWITCHASSEMBLYGreyWireYellowWire(Up)ContactCenter LimitContactDriveGear12431819171510141289
39ACCESSORIES WARRANTY10 Foot (3.06 m) Rail Extension:To allow a 10 foot (3.06 m) door toopen fully.187951879118756187401883518752SECURITY✚ Compact3-F
Safety Reversing SensorHeader WallAccess Door — — — — — — — —SafetyReversingSensorGap between floor and bottom of doormust not exceed 1/
40Get it fixed, at your home or ours!Your HomeFor repair – in your home – of all major brand appliances,lawn and garden equipment, or heating and cool
®®1/2 HPOUVRE-PORTE DE GARAGEPour résidences seulementModèle • 139.18070Manuel D'InstructionsFRANÇAIS Sears Canada, Inc., Toronto, Ontario M5B
2Introduction Pages 2-7Revue des symboles de sécurité et des mots de signalement . . . . . . . . . . . . . . . . . . . . . . . . . . . . . . . . 2Prép
3Pince universellePince coupanteMarteauScie à métauxTournevisClé à moletteClé à douille et douillesde 1/2 po et 7/16 de poPerceuseRuban à mesurer21Esc
— — — — — — — —Il faudra poser des renforts horizontaux et verticaux dans le cas d'une porte de garage légère (en fibre de verre,
RailPORTE FERMÉEL'espace entre le plancheret le bas de la portene doit être supérieurà 1/4 de po (6 mm). Ported'accèsDétecteurinverseurde sé
6Inventaire de la boîte d’emballagePoulie du câbleChaîne et câbleSupports de suspensionSECURITY✚ Télécommande à troisfonctions et pince de pare-soleil
Inventaire des fixationsSéparer toutes les fixations et les regrouper comme illustré ci-après aux fins des opérations de montage et de pose.Écrou à or
8ChariotFenêtredécoupéePinces de blocageTrou de la poulie8 po (20 cm) de distancedu trou de la poulieLanguettesExtrémitéeffiléeChariot intérieurCoussi
9Afin d’éviter d’endommager SÉRIEUSEMENT l’ouvre-porte degarage, utiliser UNIQUEMENT les boulons et les fixationsmontés sur le dessus de l’ouvre-porte
AccessDoorSafetyReversing SensorSafetyReversingSensorGap between floor and bottom of doormust not exceed 1/4" (6 mm)DoorBracketStraightDoorArmGar
Pour éviter d’éventuelles BLESSURES GRAVES aux doigts parsuite du mouvement de l’ouvre-porte :• TOUJOURS garder la main à l’écart du pignon lorsquel’o
11IMPORTANTES INSTRUCTIONS CONCERNANT LA POSEÉcrouextérieurRondelle-freinArbre duchariotChaînePatin du rail1/2 po (1 cm)Pour visserl'écrou extéri
POSE – 1reOPÉRATIONDéterminer l’emplacement du supportde linteauLes méthodes de pose varient en fonction de la porte dugarage. Suivre les instructions
13LinteauAxeverticalAxe verticalde la portedu garage2 x 4Plafondnon fini2 x 4MONTAGEDU SUPPORTDE LINTEAUAU PLAFONDEN OPTIONSolivesPortePoint de course
UPTrous de fixation au plafondAxe vertical— Plafond fini —6 po (15 cm) maximumAxe verticalRessort de la portePorte degarageSupport de linteau- Linteau
Porte de garageOPTION AVECINSTALLATIONCRAFTSMAN EXISTANTESupport de linteauPoulieLinteauSupportde linteauTrou demontageSupport de linteauexistantEntre
162 x 4 à platPorteChariot Dessus de l'ouvre-porteDessus de la porteSupportde LinteauENGAGE DEGAGEBiellette dedégagementdu chariot´´´Pour préveni
Mesurerla distanceTire-fond de5/16 po x 18 x 1-7/8 poSolivesBoulon de 5/16 po-18 x 7/8 po,Rondelle-frein de 5/16 po,Écrou de 5/16 po-18Cornière(Non fo
POSE - 6eOPÉRATIONPose de la commande de portePoser la commande murale dans un endroit où on pourrala voir de la porte, à au moins 5 pieds (1,52 m) du
19Ampoule standard de 100 W (max.)Ampoule standard de 100 W (max.)Charnière de diffuseurCharnière de diffuseurLanguette de dégagementLanguette de déga
6Your garage door opener is packaged in two cartonswhich contains the motor unit and the parts illustratedbelow. Note that accessories will depend on
Pour éviter les difficultés pendant la pose, ne pas fairefonctionner l'ouvre-porte pour le moment.Afin de minimiser les risques de chocs électriq
• S’assurer que l’ouvre-porte de garage est hors tensionAVANT de poser le détecteur inverseur de sécurité.• Pour prévenir des BLESSURES GRAVES ou la M
22MONTAGE AU SOL (côté droit)MONTAGE MURAL (côté droit)MONTAGE SUR GUIDES DE PORTE (côté droit)TémoinlumineuxDiffuseurRebordSupport dedétecteurGuidede
Boulon à tête bombée et collet carré de 1/4 po-20 x 1/2 poDiffuseurÉcrou à oreillesFigure 47/16" (11 mm)Bornes à raccordement rapide.3. Insérer
Pour prévenir les dommages à la porte de garage, renforcerl’intérieur de la porte par une cornière tant verticalementqu’horizontalement.24AxeverticalH
Positionnementfacultatif dusupport de la portePour une porte sans cadre exposé, ou pour la pose facultative, utiliser des tire-fond de 5/16 po x 1-1/2
26Couper cette extrémitéRondelles-freinde 5/16 de poÉcrous de5/16 de po-18Support de la porteAnneau d'arrêtSupport dela porteBiellettecourbéeBiel
27Écrous de5/16 de po-18Rondelles-freinde 5/16 de poAnneaud'arrêtBiellettedroiteBoulons de5/16 de po-18 x 7/8 de poSupportde la porteAxe de chape
Sans un système d’inversion de sécurité bien installé, despersonnes (plus particulièrement les petits enfants) pourraientêtre GRIÈVEMENT BLESSÉES ou T
29Vis de réglagede la forceÉtiquette de Réglage de la ForceSans un système d’inversion de sécurité bien installé, despersonnes (plus particulièrement
MasterLink (2) Idler Bolt (1)Nut3/8" (1)Trolley Threaded Shaft (1)Bolt 1/4"-20 x 1-3/4" (2)Lock Washer3/8" (1)Chain Spreader (2)Lo
Sans un système d’inversion de sécurité bien installé, despersonnes (plus particulièrement les petits enfants) pourraientêtre GRIÈVEMENT BLESSÉES ou T
31IMPORTANTES CONSIGNES DE SÉCURITÉFONCTIONNEMENT1. LIRE ET SUIVRE TOUS LES AVERTISSEMENTS ETINSTRUCTIONS.2. TOUJOURS garder les télécommandes hors de
Utilisation de la commande de porte àmontage muralLA COMMANDE MURALE DE LUXEAppuyer sur bouton-poussoirmuni d’éclairage pour ouvrir oufermer la porte.
Entretien de l’ouvre-porte de garageRÉGLAGES DE COURSE ET DE FORCE:Les conditions climatiquesrisquent de causer depetites modifications dansle fonctio
34Défauts de fonctionnement (suite)6. La porte s’ouvre et se ferme toute seule :• S’assurer que tous les boutons-poussoirs de latélécommande sont à l
Pour effacer tous les codes de lamémoire du moteurPour désactiver toute télécommande non désirée, effacerd’abord tous les codes :Enfoncer et tenir le
361. Entrer un numéro d’identificationpersonnelle (NIP) à quatre chiffresde son choix sur le claviernumérique. Enfoncer et tenir ensuitele bouton ENTE
1176510138NOTICE4121412315169LOCKLIGHT1652437837Pièces pour la posePIÈCES DE REPARATIONPièces d’assemblage du railN° DERÉF. PIÈCE DÉSIGNATION1 4A1008
38124318191715101412891156771613DNUPFil brunContact (fermeture)INTERRUPTEUR DE FIN DE COURSEFil grisFil jauneContact(ouverture)Contact de milieudu cou
391879518791187561874018835187521872841A52811879218785ACCESSOIRES Rallonge de rail de 10 pieds (3,06 m) :Pour permettre à une porte de 10 pieds(3,06 m
8ASSEMBLY STEP 1Assemble the Rail & Install the TrolleyTo avoid installation difficulties, do not run thegarage door opener until instructed to do
40Get it fixed, at your home or ours!Your HomeFor repair – in your home – of all major brand appliances,lawn and garden equipment, or heating and cool
9To avoid SERIOUS damage to garage door opener, use ONLY those bolts/fasteners mounted in the top ofthe opener.ASSEMBLY STEP 3Install the Idler Pulley
Related products and manuals for Garage Door Opener Craftsman 139.53995SRT

 (76 pages)
© 2020, manymanuals.com. All rights reserved. | 0.146 s |
 Manymanuals.com
 Manymanuals.de
 Manymanuals.fr
 Manymanuals.it
 Manymanuals.pl
 Manymanuals.cz
 Manymanuals.es
 Manymanuals-pt.com
Comments to this Manuals