3
2
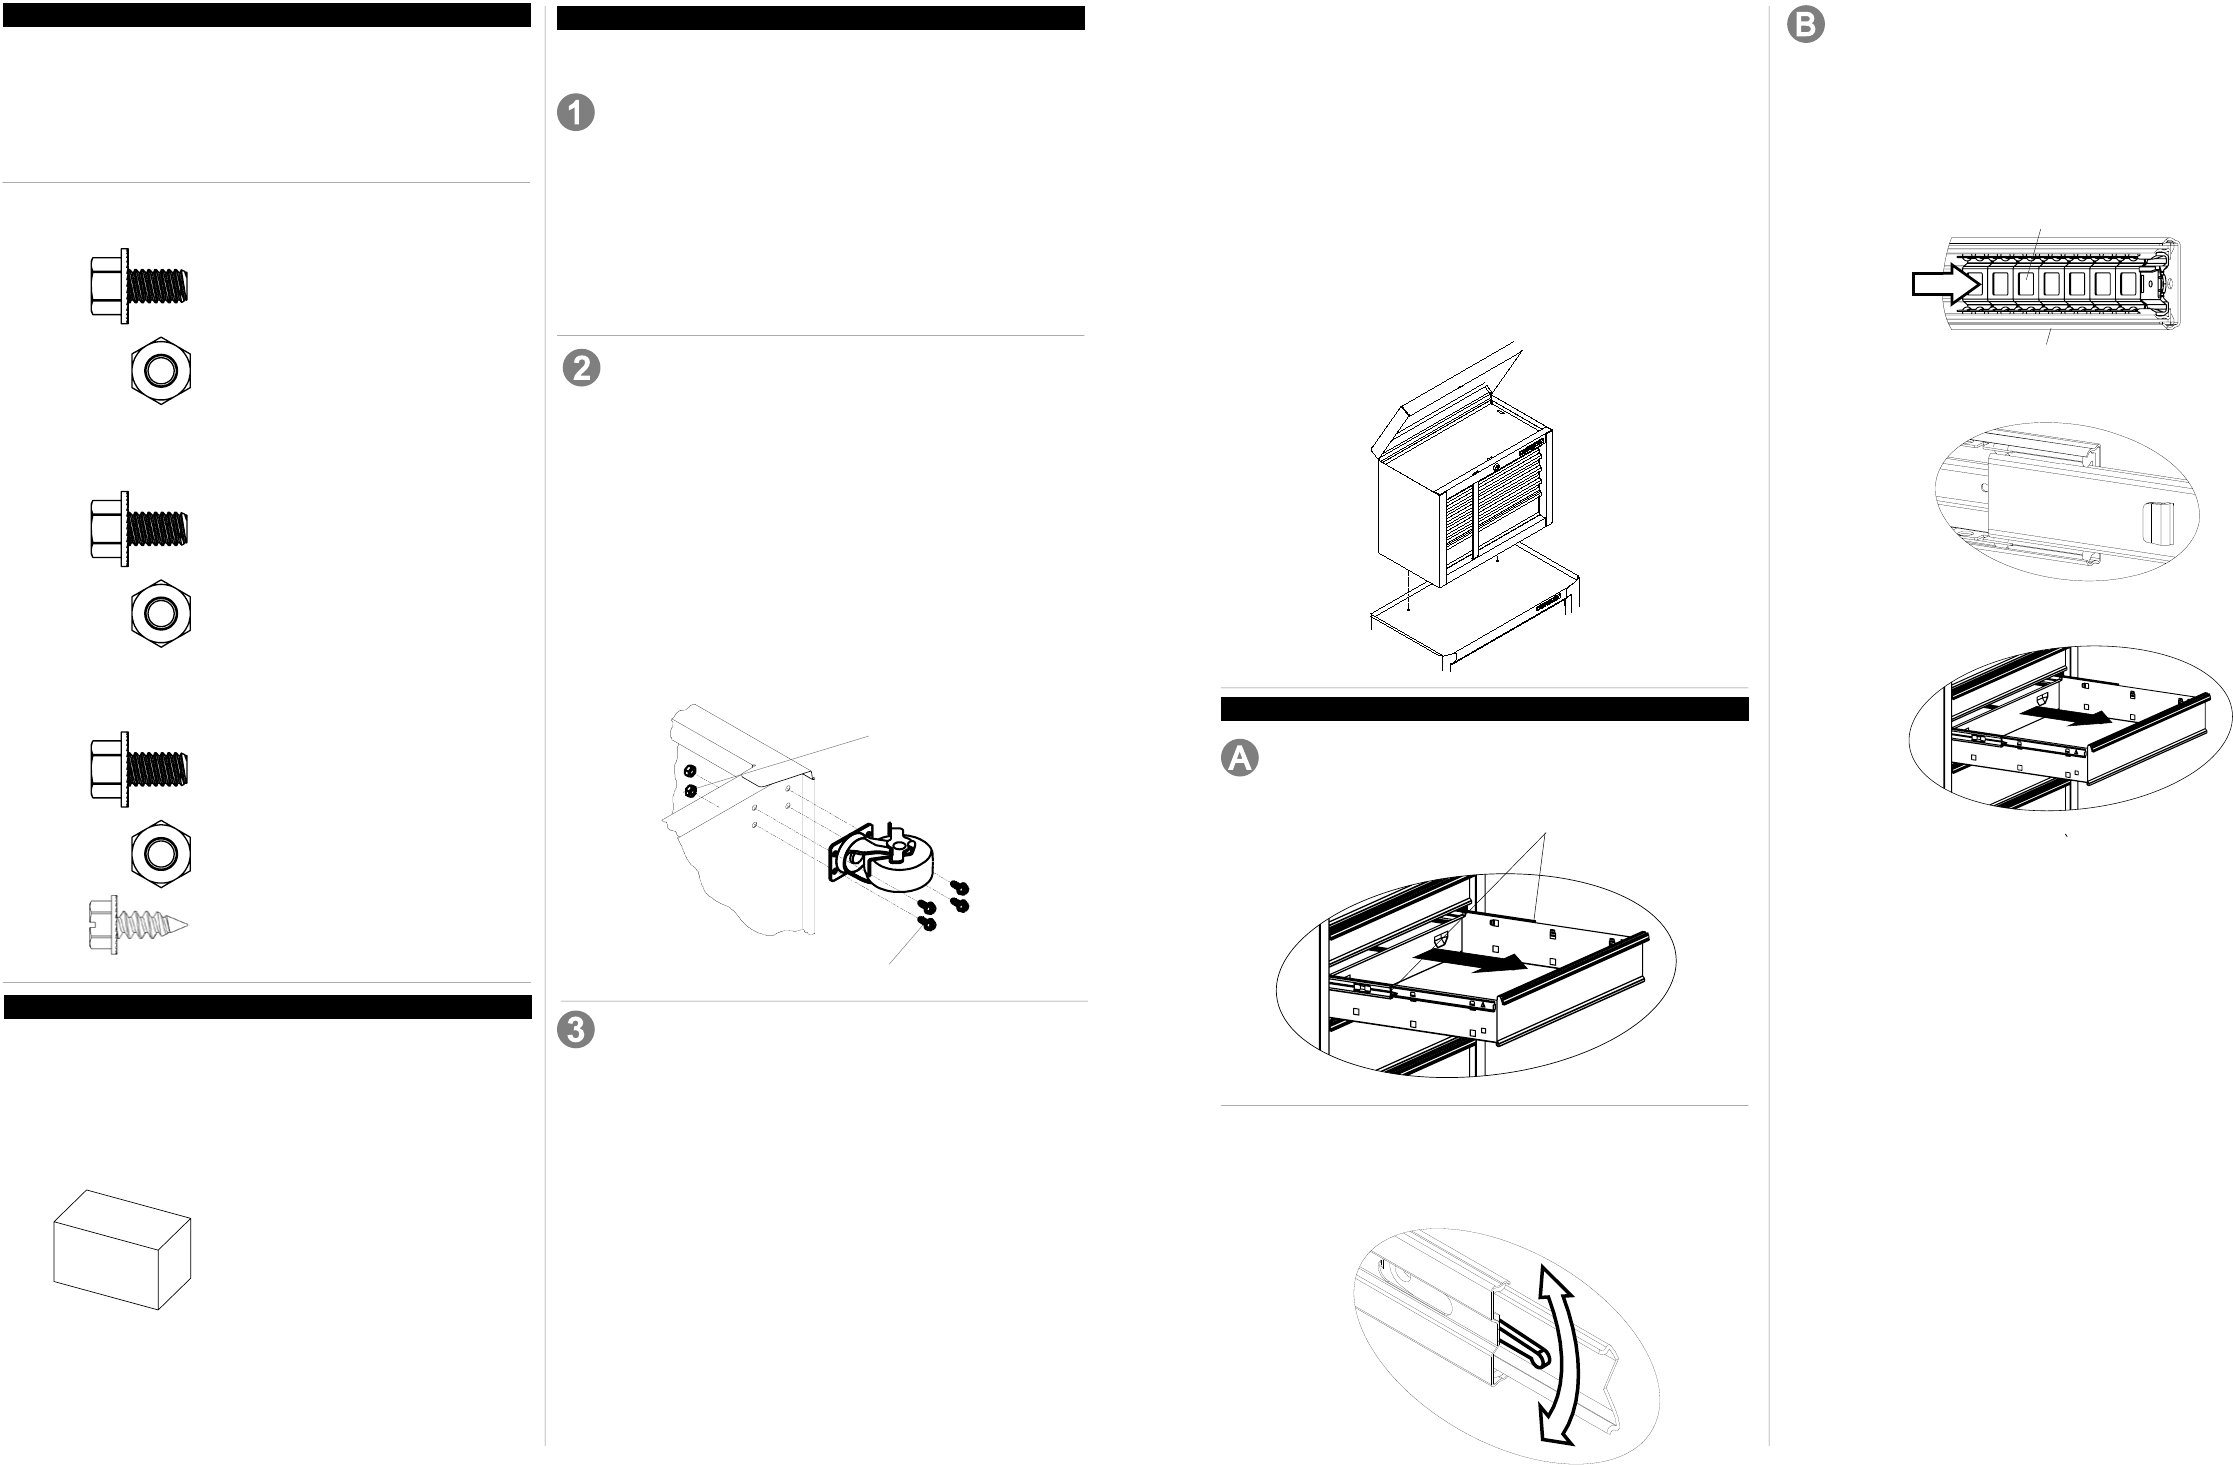
Release
Screw
Nut
Slide Carrier
Slide
Ball bearing slides - Pull slides and slide carrier out to
fully extended position (see illustration). Hold the slide
on the cabinet while aligning it with the slide on drawer.
Slightly insert one side and repeat for the other side. Slow-
ly push drawer to its fully closed position to engage slide.
Open drawer and reclose to ensure proper operation.
REINSTALL DRAWERS
1/4 - 20 Nut (Qty: 16)
1/4 - 20 x 5/8" (Qty: 16)
NOTE: Not all assembly instructions will apply to
your model.
ASSEMBLY
Process:
NOTE: Use adequate manpower for this operation.
• Open the bulk storage panel or remove bottom drawer.
(Refer to Operation section Removing Drawers)
• Lay the unit on its back, use packaging material to
protect the paint nish.
• Attach the casters to unit using (4) 1/4-20 x 5/8" screws
and (4) 1/4-20 nuts per caster. Mount both swivel casters
on the same side of the unit. Wrench-tighten.
• Return the unit to its upright position.
• Close the bulk storage panel or replace drawer.
CASTER INSTALLATION
Items Needed:
1/4-20 x 5/8" Screw (Qty: 16)
1/4-20 Hex Nuts (Qty: 16)
TOOLS REQUIRED:
Flat-tip Screwdriver
3/8-in. Wrench
7/16-in. Wrench
5/16-in. Drill Bit
HARDWARE
Caster pack
CARTON CONTENTS
Chest:
Literature
Cabinet:
Literature
Hardware bag
Caster pack
OPERATION
• Empty the drawer.
• Fully extend the drawer
REMOVING DRAWERS
Lever Style - Lift or lower (depending on the slide) the
release lever on both sides, (this allows the slides to ride
over the stops). Pull out to remove.
OPTION 2 - MOUNTING CHEST TO
TOOL CENTER CABINET
REMOVE CHEST FROM ROLLING CABINET
(TOOL CENTER)
• The unit comes with the chest secured to the inside of
the cabinet by either two or four 1/4-14 x 5/8 screws.
• Lay the cabinet down on its back. Use packaging mate-
rial to protect the paint nish.
• Remove the securing screws from the underside of the
cabinet. Save the screws for mounting the chest to the
cabinet.
• Remove the chest.
• Remove the top drawer from the cabinet (refer to the
drawer removal instructions).
• Lift the chest onto the cabinet. Line up the holes in
the bottom of the chest with the holes in the top of the
cabinet.
• Attach the chest using two 1/4-14 x 5/8 screws that
were used to secure the chest to the bottom of the
cabinet.
• Wrench tighten all screws.
• Replace the drawer (refer to the drawer installation
instructions).
• To remove the chest, reverse the procedure.
1/4-14 x 5/8 Sheet Metal Screw
(Qty: 4)
HARDWARE REQUIRED:
TOOL CENTER
HARDWARE REQUIRED:
CABINET
1/4 - 20 Nut (Qty: 16)
1/4 - 20 x 5/8" (Qty: 16)
HARDWARE REQUIRED:
MIDDLE CHEST
1/4 - 20 Nut (Qty: 4)
1/4 - 20 x 5/8" (Qty: 4)
OPTION 1 - MOUNTING TOP CHEST TO MIDDLE CHEST
• Remove enough drawers to access the top and bottom
mounting surfaces of the units (refer to the drawer
removal instructions).
• Place the chest in the desired location on top of the
middle chest and mark the mounting hole locations.
• Remove the chest and drill four 5/16” (8mm) holes
through the top of the middle chest.
• Secure the units together using four 1/4- 20 x 5/8 inch
screws.
• Wrench tighten all screws.
• Replace the drawer (refer to the drawer installation
instructions).
• To remove the chest, reverse the procedure.
 Manymanuals.com
 Manymanuals.de
 Manymanuals.fr
 Manymanuals.it
 Manymanuals.pl
 Manymanuals.cz
 Manymanuals.es
 Manymanuals-pt.com
Comments to this Manuals